We have moved to a new site, http://wyseworld.com/.
NEW SITE
Jupiter and Venus
Should you buy the iPad 3?
Easy answer, No. Why? Because you can save your self $100 by buying the iPad 2, which is pretty much THE SAME EXACT THING AS THE 3!!!
The new “revolutionary” iPad has the same processor as the 2, (just clocked at the speed it should have been before.)
An upgraded 5MP AF Back Camera (Whoopdeedoo, I’m going to go and take pictures with my iPad because now it has a better camera. I mean seriously… the back camera DOESN’T MATTER!!! Unless of course you want to look like an idiot taking pictures WITH A TABLET!!!!)
and
Quad-Core Graphics (yeah, it needs to power to run BF3, oops I mean angry birds &_&)
Now unless you’re willing to spend $100 dollars more just to get a retina display, you should buy the iPad 2… Unless you’re in the market for a tablet with connectivity on the go and want 4G, in that case than you should pick up the iPad 3 with 4G. But if you want to sacrifice speed and save money, than get the 3G version.
Lulumahu Falls attempt during flash flood
Let me start off my saying… hiking by a stream, during a flash flood/ after heavy rain, can be fatal. Be careful and don’t try to cross a raging stream unless you’re prepared for it!
Friday a big storm formed over the Koolau which dumped choke rain on the mountain from Pupukea to Nuuanu. After going up and down the pali friday afternoon and seeing the MASSIVE waterfalls on the Konahuanui side (This was around 6:20pm) we made the plan to hit Lulumahu Stream in hopes of making it to the Falls.
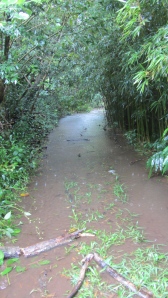
We then got to the parking lot at around 9:45 in the pouring hard rain, after waiting around 20 minutes for it to calm down little bit, we made our way up the gravel road. Once I made the left turn and seeing the flooded path, I knew making it to the falls was probably not going to happen as the crossing the dam would be hard, as well as the other multiple steam crossing.
Since I was determinted to get to the falls, I just trudged though and made my boots a pool. The deepest the water got was was about 15 inches.
Soon I saw the gauging station dam/limiter, and it was restricting so much water that it went down the trail. (so that’s why there was the flood over there)
After that easy crossing, we made our way up to the dam crossing which I’ve been fearing.
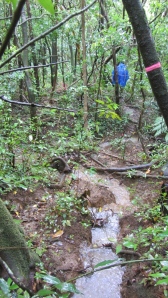
Before getting there, the little ditch which is dry on a normal day was flowing and there was even a nice little water fall.
Now getting back to the dam, it was rushing just as I thought which made the crossing treacherous, as well as all the other crossings.
We then looked around for a way to get onto the other side but since we didn’t have any hiking poles/sticks we couldn’t do it without risking a trip to the pool and possible down the “waterslide” (dam).
Since I was still just as determined to get to the falls, we wen’t back to the turn with the little waterfall and crossed it and followed some hunter trails back to Lulumahu Stream. It’s not a good idea to do that as YOU CAN/WILL GET DISORIENTATED AND LOST!
Eventully made it back to Lulumahu Stream.

We made it back to the stream via the trail on the right. The stream trail on the left (which looks like a stream is the stream trail)
The beginning seemed familiar but then shortly became new. I think we missed a crossing to make it onto the east side of the stream but that wouldn’t have been possible so whatever. Anyway we keep on going until there was no other other way to continue, unless of course we go up Lulumahu Ridge but I didn’t want to do that. Unfourtantly I didn’t take a photo of the the stream since it was raining so hard I didn’t want to risk flooding my camera that isn’t waterproof, it was all wet on the exterior. I did however take a pic of the trail to Lulumahu Ridge.
After somewhat assending Lulumahu Ridge, we followed the ribbons back to at the time , the joining of two little but raging streams. After jumping over it, we got to some sort of hunter trash. A punch bottle with some sort of red thing inside hanging from a rope (didn’t take a pic). Since we saw that on the way up, we knew we were going the right way and shortly made it back to the ditch crossing and the trail back to the road.
And that concludes our adventure to Lulumahu Valley after/during heavy rains for many hours.
If you would like to see the all the photos I took on this hike, click here.
I also took 2 videos of the raging stream, you can find the video below
Walk N Text Review
Recently I reviewed an application called Walk N Text on my youtube channel, now I’m going to do a written review. If you wish to watch the video so you don’t have to read, it’s right below.
This app uses your iDevice’s camera and shows the image on the screen with a keyboard over it so you can type/text and see where you’re going.
Let’s start off with its features.
You can change the color of the text and keyboard.
You can choose between a somewhat transparent keyboard, and the standard apple keyboard.
Option to turn on your phones LED Light* (iPhone only)
Ability to copy text easily.
and last but not least, ability to send text to Facebook, Twitter, Email, and SMS.
The only negative with this application, is that the transparent keyboard is sluggish, harder to type with, and doesn’t have spell check.
For the price of $0.99, it’s a steal! Once you buy it, you can download it on your iPad and iPhone.
Want it? Here’s the link to go download it! http://itunes.apple.com/us/app/walkntext/id496962781?mt=8
Will the iPad 3 have no home button?
As you probably know, Apple released invites for a event March 7th, with an iPad saying “We have something you really have to see. And touch”
Something else that caught the eye of people, was no home button on the iPad.
Apple isn’t going to remove the home button, they shot the image in landscape mode, which made it look like they removed the home button. I declare Apple an… ATTENTION WHORE.
Okay maybe not, they might have just wanted to screw around with the “iFans.”
Point of this is, APPLE ISN’T DUMPING THE HOME BUTTON! You just got trolled by Apple.
Konahuanui 2 (2-4-2012)
The weather looked good that weekend, friday was a cloudless day all over the Koolau, and saturday the weather looked like it will be a repeat. This would be my second attempt at hiking to this peak, first time was technically my first Koolau Summit Hike and didn’t bring enough supplies so we had to turn around , we were just 1 more climb away from the summit!!! That time we also started at Nuuanu Trail since the parking is safer there and to wash mud off in the stream, that was a mistake because of more elevation gain, and more walking.
Since I never made it to the summit, it was still on my list and slowly became more and more important to finish it. As I had mention eariler, the weather looked perfect so Febuary 4th was the Konahuanui 2 redemption day.
After doing that tiring hike up from Nuuanu, I decieded to take the most recommended route and started at Kalawahine. We started at 9:40am (yup, we late hikers) and got to the lookout in 50 minutes.
The trail to the lookout is simple, Kalawahine is pretty wide with small incline and declines, you cross a couple small waterfalls (dry but if raining should be flowing).
Pauoa Flats slowly gains elevation and is very rooty, it should be re-named to pauoa roots trail 😛
Once reaching the lookout, we took a quick water break and then went though the overgrown beginning, after some turns you will reach a short clear mostly straight stretch. Make sure you keep an eye out for a trail on your left, this is the contour trail and you really want to take this unless you want to hike an overgrown ridge. You can miss it if you aren’t paying attention as you have to make almost a U turn to get onto it.
Of course I didn’t take a picture of it on my second time hiking it as on both occasions going in was almost a rush and coming out, tired.
The contour ridge isn’t very wide and screwing up on your footing could send you tumbling down into Nuuanu Valley, but there’s plenty vegetation and trees to hold onto, don’t rush here and make sure you watch your footing or else you will most likely trip and will most likely fall and die or be seriously injured!
Eventually, after going in and out of I think 5 small valleys, you re-join the ridge.
Side Note:
When on the 3rd “mini valley” (I believe) you can see Lulumahu Falls.
Now that I’m done giving directions, back to my story 😛
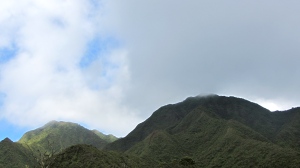
After getting a view again of the destination, I could see clouds starting to touch the summit,
My first thought was YOU BETTER NOT SOCK IN THE SUMMIT!!! and my second thought was well, if it does get socked it, it would be cool to hike in the clouds again.
As we kept on climbing, more and more clouds gathered and I became furious as the reason I hike is for the view, not to be in the clouds.
As you keep climbing you will continue to get an even better view, assuming the clouds aren’t very low. You can even see some of the windward side, including the Top of Haiku Stairs.
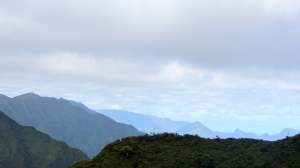 Which was all clear, I should have done Moanalua Middle Ridge instead of putting it off for K2
So there is a total of 3 big climbs to the summit, all have rope except for the beginning of the first one. It’s can be pretty steep.
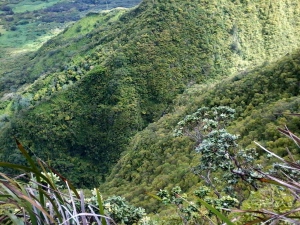
First photos is looking up at the first steep climb. Second photo is looking down from the top of the first false summit.
BTW the first climb is the red eroded trail you see when looking at it from afar.
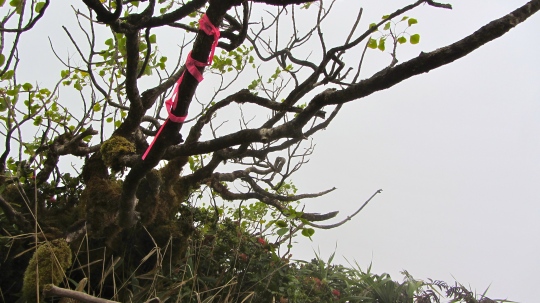
After the third steep climb you see the tree below
To get to the Konahuanui 2 Summit, keep walking and go left, you’ll than reach a clearing and that’s the summit! If you’re looking for the benchmark, it’s on the South End.
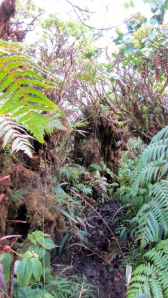
If you want to continue to Konahuanui 1, keep going North West, but be prepared for lots of mud, I’m not even kidding! I always thought people were over exaggerating the Koolau Summit Ridge Mud but it aint no joke, it’s muddy, wet, and mossy, and it aint gonna change unless the weather extremely changes for a long period of time.
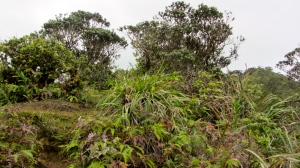
This is what you’ll be hiking though if you want to make it to Konahuanui 1.
Since this amount of mud wasn’t acceptable for my Dad, we turned around and went to rest and eat lunch at the now fully socked in K2 Summit.
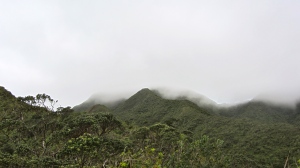
When we first made it up there, this was the only view we got.
It was disappointing to hike into a clouded summit, but at least we made it to the top unlike last time… and it was cool to hike in the clouds, you can see a video I posted from the clips I took on the ridge below.
It took a total of 6 hours and 25 minutes to finish this. How long depends on how fast you are, and how much endurance you have. We were going pretty fast and took minimal rest breaks, I was also doing this in a 20sh pound backpack.
If you want to see all my photos from this hike, here’s the link https://plus.google.com/u/0/photos/116631801012448706917/albums/5705855558458685969

